
While teaching our online creative camera craft class, one of our goals was to discuss topics that we felt many photographers may not know. One of those topics is RGB graduated ND filter use. What is that, you ask? With cameras recording more dynamic range, and graduated filters available in PS and LR, some photographers may not be using graduated ND filters in the field. It’s true, you can do some amazing things using that graduated filter in Lightroom. But I never leave on a shoot without my Singh-Ray graduated ND filters, and here are few reasons why.

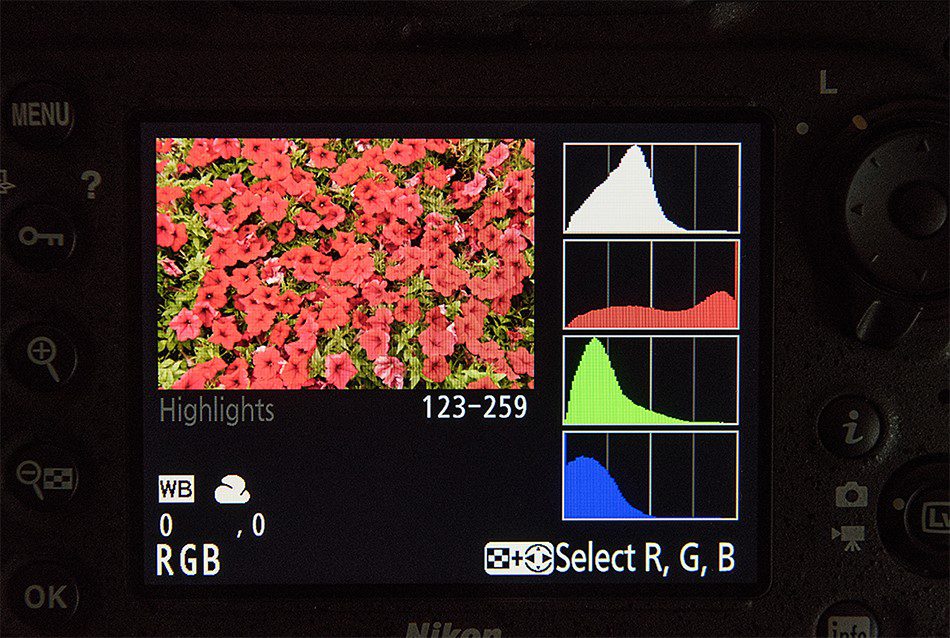
First, the RGB question. I always recommend photographers have their RGB histogram turned on when evaluating exposure in the field. While the cumulative luminance histogram may show no clipping in your image, an individual channel may be way blown out and over exposed. Take a look at the shot above. The non-RGB histogram shows everything is good with my exposure, but my red channel is way over exposed. When I open this up in LR or PS and try to recover my red channel the rest of the image will go really dark. If I print the shot with the red channel blown out, I get blocked up and muddy red colors, not good.

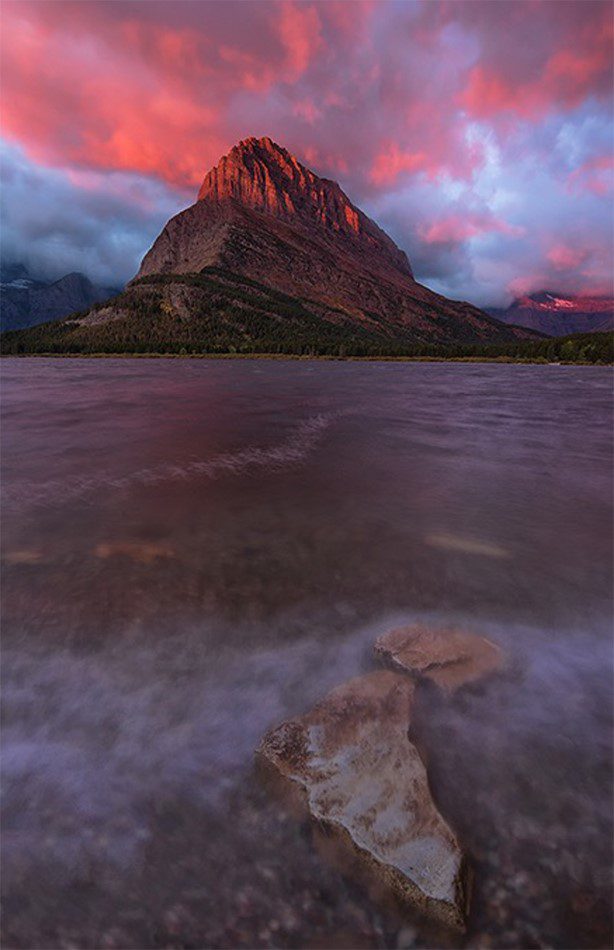
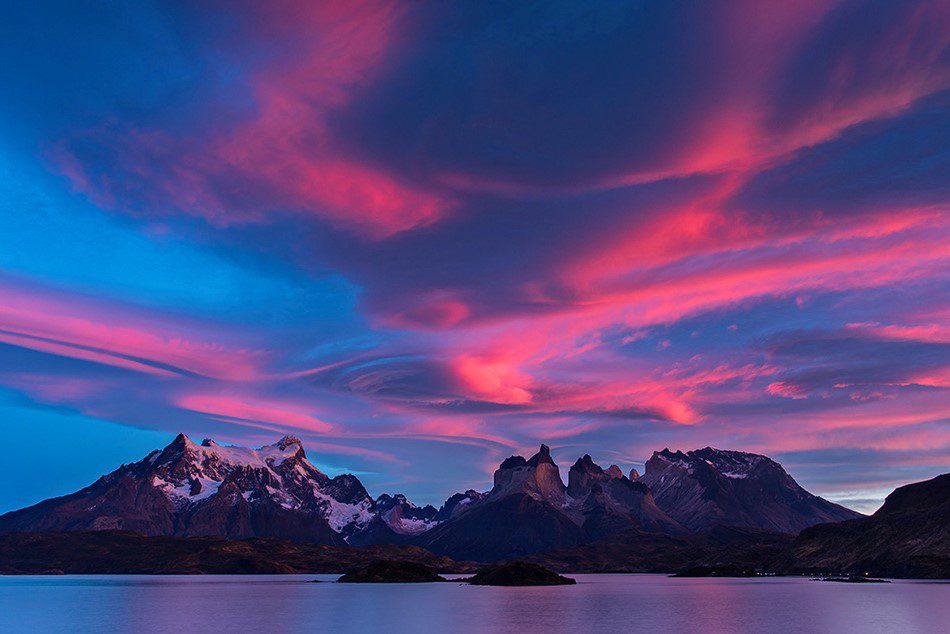
Now imagine a landscape that has a flaming cloud layer at sunset, but the foreground is in shade. If I expose for the red channel so I don’t blow out my highlights, the foreground will go really dark, and I will lose a lot of pixel data, something I need to make a nice large print (remember there is more information in the highlights with digital capture). To reduce the contrast in the field, and capture more shadow detail, I use my Singh-Ray graduated two stop ND filter. With this attached I can exposure for the red channel highlights and still capture a lot of shadow foreground detail. Graduated ND filters are especially helpful during dramatic crimson sunsets and sunrises. The sky is flaming red, the waves are crashing on the beach, the trees are blowing in the wind (no HDR here, too much movement) you have to nail this shot. You soon find out you are using almost minus two stops of exposure comp to save the red highlights in the sky, and your foreground is really dark. Just put on that ND filter, reduce the contrast in the scene, and get a better image with more pixel data.

The other reason I like to use ND filters (and other filters) in the field is, I’d rather capture the image in-camera if possible. Post processing is part of digital photography and working on images in the computer is part of the workflow. But I find I might change the way I photograph a scene when I see my results in real time in the field on my camera LCD. I may decide to include more sky or foreground rather than crop it out if the exposure looks good in-camera. And I’ll admit it, I would rather be in the field with the wind in my face taking pictures rather than working behind a computer in the office. If you submit to photo contests, and they question how much computer processing was involved, you can show the beautifully exposed raw file right out of your camera.