
If you have opened a photography magazine lately, chances are you have seen an infrared (IR) image in one form or another, IR photography has seen a recent resurgence of popularity, largely because digital IR is so much easier than the notoriously tricky handling, shooting, and processing of traditional IR film. I do have to admit I like the look for certain scenes. But here is the catch. You have to convert one of your expensive digital SLRs to shoot IR images. Or do you? If you only have a couple of camera bodies, converting one just to shoot IR eliminates 50 percent of your color shooting ability. Not good!
I was recently leading a photo workshop in Turkey, and I knew shooting IR would look great for capturing the mysterious Cappadocian monasteries and ancient Roman ruins. Lucky for me, I didn’t have to convert any of my cameras to IR; instead I used my Singh-Ray I-Ray Infrared filter mounted on the front of my 24-120mm Nikon lens.
I arrived in Istanbul right about the time the US was considering launching cruise missiles into neighboring Syria. Not the best timing, but Turkish hospitality is renowned for good reason, and I soon felt more at ease. In all my travels I have never been to a country where not only do the locals gladly pose for a portrait, but then they invite you in for lunch, and pose for even more shots.
We left the hustle and bustle of Istanbul and headed to Ephesus, site of extensive Roman ruins and the library of Celsus (above), the first location I wanted to put my I-Ray filter to the test. Using the I-Ray requires a few specific techniques. First, the filter is very dark (it’s designed to block visible spectrum light), so even in midday light you will need to shoot on a tripod. My exposures in bright sun using my D800 and 24-120mm were around 5 seconds, at f/10 at ISO 100. Second, manual mode works best for exposures. Camera meters struggle with dark ND and IR filters, and automatic modes like aperture priority don’t work well. I like to use manual mode, take a test shot and adjust accordingly. Generally this means letting in more light than the meter is indicating. Third, you need to set your focus, and then turn off your autofocus. The IR filter is too dark for autofocus to work, so focusing needs to be done before you attach the filter.
Our group was first through the gate to explore the ruins, and I headed directly for the library of Celsus before more tourists arrived. Wandering solo through crumbled ruins dating to 117 A.D. at dawn is an eerie, magical experience. It doesn’t take much imagination to visualize a bustling city from a different era. How many people would be walking in the streets? Would people be sitting on the library steps right where my tripod now stood? As the sun fully illuminated Celsus, I started shooting images both with and without the I-Ray filter. The IR effect seemed to fit the eerie, deserted feel of the location. I also experimented with other scenes using the I-Ray filter and really liked the results.


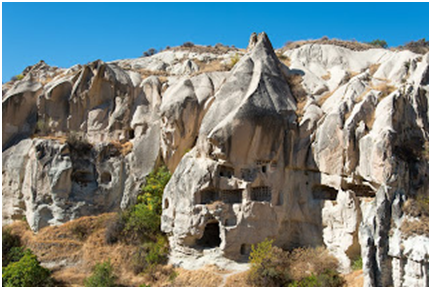
Four days later, we made it toCappadocia — a truly magnificent area and a photographer’s dream. I found myself staring in disbelief. Throughout this rugged, steep-walled canyon, carved out of the vertical cliff walls were various homes and monasteries dating back to 300 A.D. Combine sandstone spire landscapes, ancient monasteries carved out of cliffs and warm desert light and you get the picture. I could hardly wait to try out the I-Ray filter on this scene, and was not disappointed. Shooting in IR gave the scene a mysterious, ancient atmosphere, perfect for photographing this desert landscape. I’m planning on returning to Cappadocia and spending a week to really explore this world heritage site.


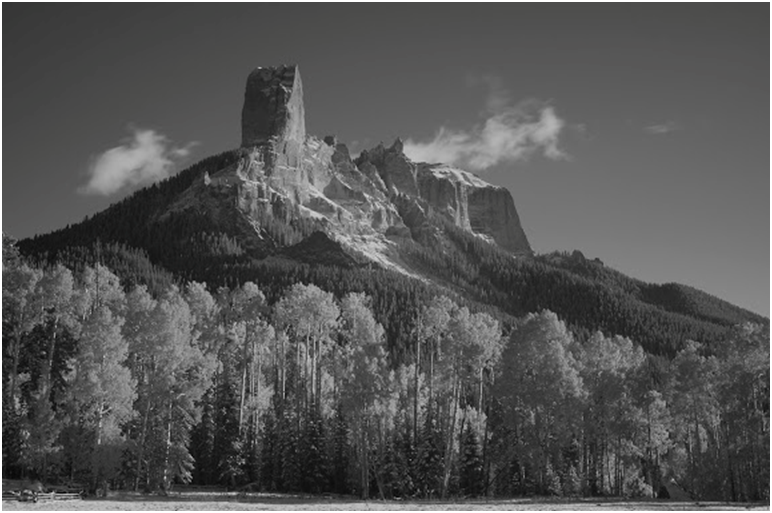
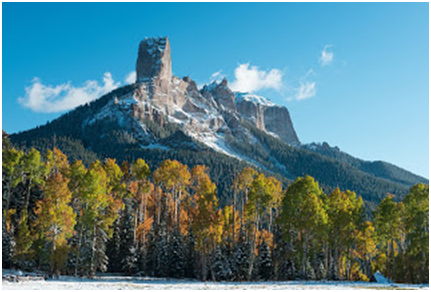
I’ve been using my I-Ray filter for quite a while now, and it works great on many types of scenes. I just returned from photographing fall colors in southwest Colorado (above), and the I-Ray filter worked well in this environment. Experiment with this filter, and you might be surprised at how much you like the results.
One caveat: different digital cameras respond differently to infrared light. Some are more sensitive than others, and responsive wavelengths may differ somewhat. However, with some trial-and-error, you should find the settings that work best with your system and the I-Ray filter.
POST PROCESSING
When you open a RAW IR-filtered image on the computer, it looks like you might expect; extremely red/magenta. A little work in post processing is necessary to coax the IR look out of the image. I normally shoot in RAW, so I made these adjustments during my RAW conversion. But these adjustments can be done later in Photoshop if you choose.
Option 1
This is the quickest way to create an IR image. The first step is eliminating the red color by desaturating your image. In the main RAW converter window, pull the ‘saturation’ slider to -100, creating a black and white image. Next, pull the ‘white’ slider to the left, somewhere around -60 or more will be good. Now take the ‘black’ slider and move it to the right to around +50. Moving the black slider to the right adds glow effect to the image. Finally, add some contrast to the scene by moving the ‘contrast’ slider to the right until you like the effect. These settings are starting points for your IR conversion; different scenes will require different amounts of adjustments.
Option 2
This option is a little more involved, but often produces better results. In the RAW window, go to the HSL/GRAYSCALE window. Check the box marked ‘Convert to Grayscale.’ Now you can adjust the image by using the color sliders listed. The first three colors — red, orange, yellow — will have the most effect on your shot. I like to experiment with the red and orange sliders. Often I will decrease the reds and increase the oranges, but it depends on the image. Once I am done here I go back to the main RAW window and add contrast. Adding contrast will darken the skies for a very moody look.
The bottom line is experiment until you like what you see, there are no set formulas. But be careful, you just might find yourself using your I-Ray filter everywhere you go.
