Los Angeles, It was a big sprawling city even in those days. One block looked like the next. I don’t have any photography to speak of from those days because I always felt that nature was elsewhere. I’ve never looked back and, through my photographic travels and workshops, I’ve been treated to some of the most beautiful and scenic locations imaginable. The National and State parks throughout the American West are my home and photographic focus.
Nevertheless, I recently had reason to visit New York City — arguably the greatest city in the world. This visit was my third, and it was just totally exciting and fun! Dragging my photo gear through this metropolis was a first. To my surprise, my appearance wearing a beat-up shooting vest and carrying my trusty tripod, and photo backpack was hardly noticed by anyone. Nothing seems out of place in the Big Apple! People were moving in all directions at top speed and the towers of the city provided a glowing backdrop. I was a kid in the candy store!
Early in my visit, I was reminded once again that the basics of outdoor photography are applicable anywhere. Composition is critical and good exposure almost as important. I also found that my filters would play the same essential role here as in our national parks.
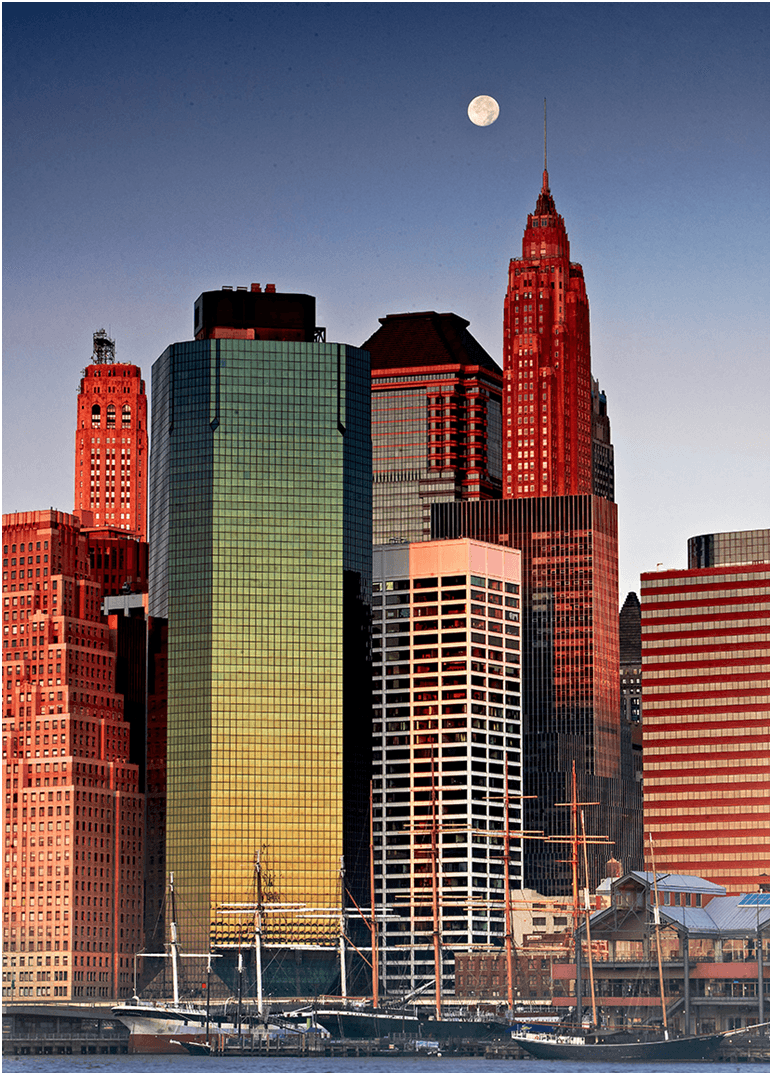
I approached the skyline sunrise (above) feeling the familiar impulse to eliminate the clutter and find the patterns and shapes that would add clarity — just as I would for any of my western landscape compositions. As I watched this early morning sunrise with a full moon setting from the Brooklyn Promenade, I felt as though we had the entire city to ourselves! Quiet and somewhat cold at 38 degrees, the harbor was still and the moonset pristine. Feeling the history of this place prompted me to set the tall ships in the foreground. With the moon falling quickly, I knew a fast shutter speed was necessary. I chose the longest lens I could fit into my backpack: a Canon 70-200mm f/2.8 IS with a 1.4 extender. In a situation like this, the filter factor of the Singh-Ray ColorCombo — with its built-in polarizer — would require a slower exposure that would have rendered the moon as an oval blur. Fortunately, I was able to use my Singh-Ray Color Intensifier with its minimal filter factor (about half an f-stop) to achieve a faster shutter speed and make this sharper image possible. While the Color Intensifier enhanced the natural color of the reflected light, my 4-stop soft-step ND Grad kept the craters in the moon clearly visible.
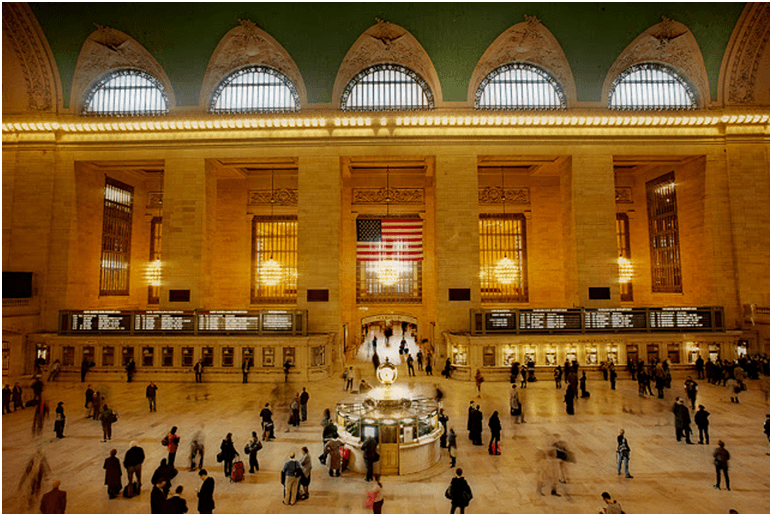
This view of Grand Central Station reflects the influence of seeing so many impressive black and white photographs of the old Penn Central Station. Tragically, that ‘cathedral’ was torn down in favor of today’s Madison Square Garden sports arena. For residents of the city, Grand Central Station is their post office and the terminal is their transportation hub. In choosing a vantage point for this image, I wanted to show the ‘hum” of the people in this grand and ever-changing environment. After deciding to use my Canon 24mm f/3.5 Tilt/Shift lens to bring symmetry to both the frame and straighten the structural lines vertically, I settled on a slower shutter speed that would render some of the faster moving travelers as ghostly blurs. This was accomplished by using the Singh-Ray ColorCombo. In this case there was no light to be polarized, but the additional filter factor gave me the slower shutter speed I wanted and warmed the light at the same time. Balancing the wide difference in exposure levels was a challenge. The windows near the ceiling read almost seven stops brighter than the shadow areas. A 4-stop hard-step ND Grad held the exposure from the top lights to the top of the image. All that was left was to wait and choose the traffic pattern I wanted for the image.
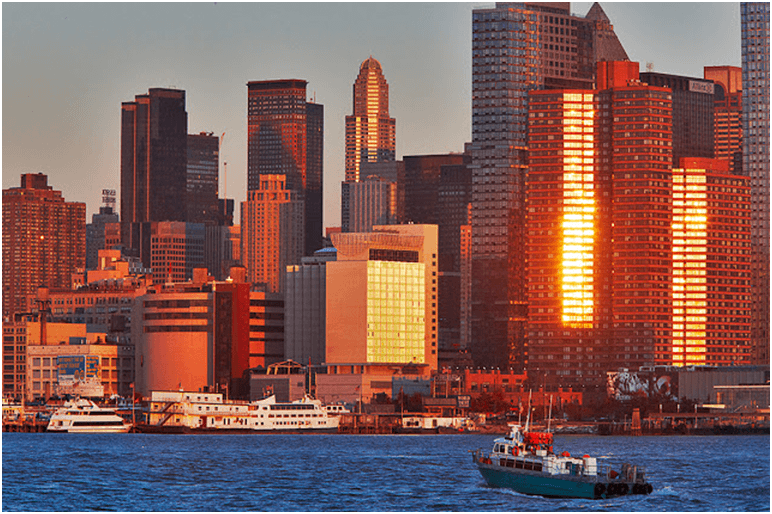
Properly exposing this waterfront image was another challenge. The motion implied by the boat was needed to lead the eye toward the primary focal point which is the reflected light on the building windows. I began by finding a shutter speed quick enough to freeze the moving boat and then choose f/11 as an aperture small enough to assure good overall depth of field with the Tilt/Shift lens. To achieve the right combination of 1/500 at f/11, I grudgingly selected an ISO setting of 800. Next was the selection of the Singh-Ray ColorCombo to both increase the color saturation and, more importantly, cut the glare. However this left the water a deep shadow. This was corrected by increasing the exposure 1 2/3 stops and inserting a 4-stop hard-step ND Grad all the way down to the waterline. Now, looking at the image with everything aglow and the exposure levels more evenly balanced across the entire frame, it looks like an easy shot.
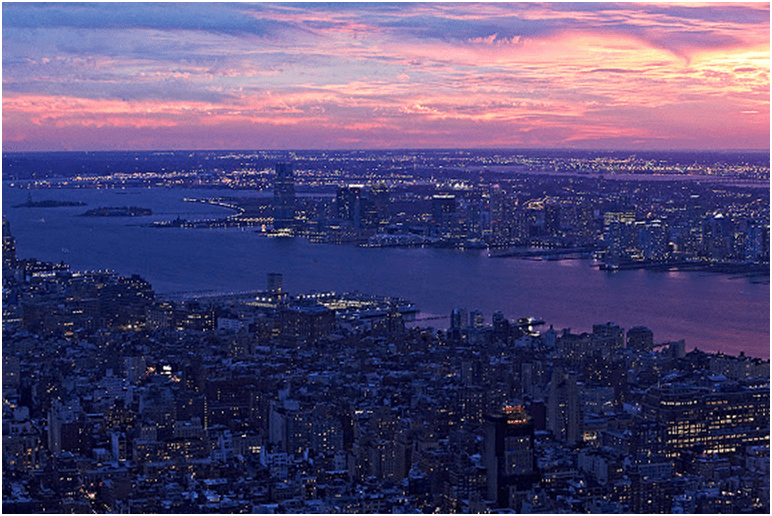
A ‘must see’ tourist attraction, the Empire State Building allows a good view of almost everywhere. With no tripods allowed, my inclination was to leave the photo gear in the vehicle. After a few moments’ thought, that idea was dismissed for many reasons, and I figured I was just going to carry it as one might through an airport. Actually, the security both here and at the Statue of Liberty/Ellis Island is the same as it was at the airport! In the end I was glad I had it. Wherever I went, I found myself hand holding my image stabilized 70-200 while standing shoulder-to-shoulder with about 400 of my new and closest friends! As the light faded into a great sunset, motionless images became almost impossible. This situation was the best case I could ever make for owning the Singh-Ray Color Intensifier. Any other filter would have created impossibly slow shutter speeds. With little or no filter factor to worry about, I used it for every frame until the light was gone!
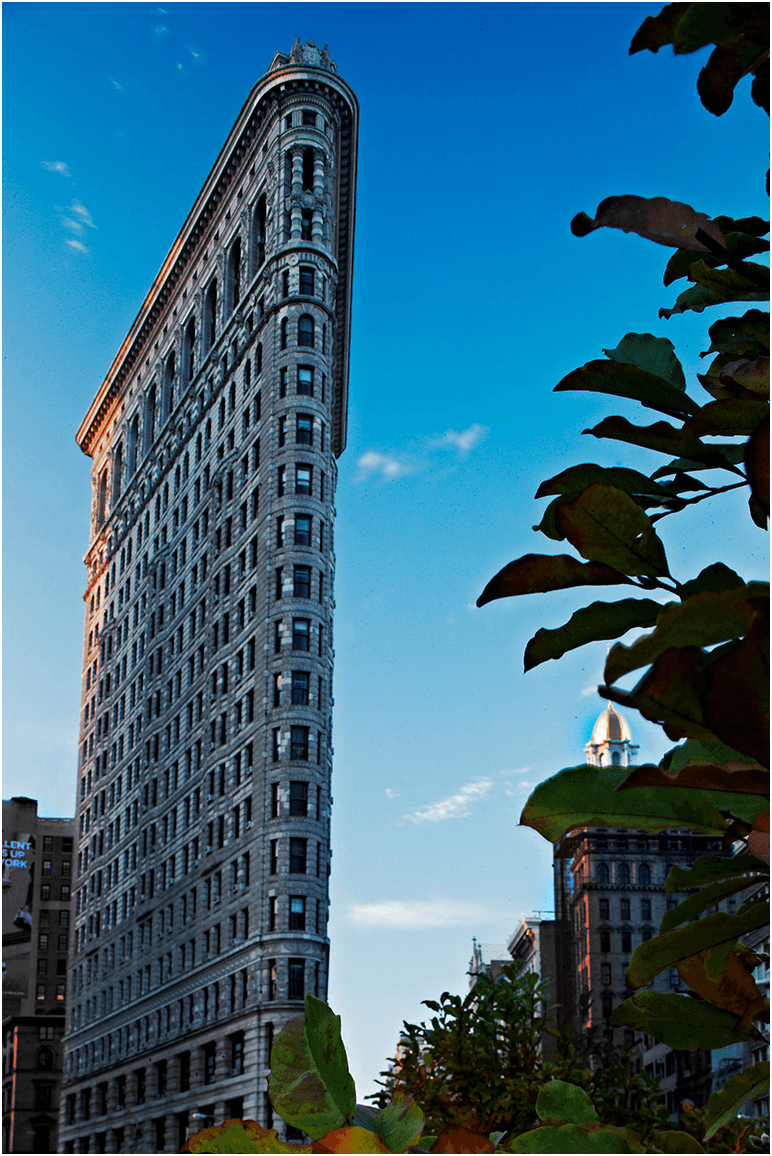
Here again it was deja vu. I’ve viewed hundreds of images of the Flat Iron Building done by the masters ever since the days when this beautiful structure was the tallest skyscraper in Manhattan. Since I expected the light to play a major role in this first-light situation, it was pretty much a landscape photographer’s mindset from the beginning. My preconception, however, did not hold up when the light came forth, and so the creative process took over. The composition was adjusted when I discovered a lot of open space at the foot of the building across the intersection. I just could not find a location in the pre-dawn that satisfied me. Instead, I set up where the bottom of the building was obscured by hedges and trees and made a frame from the tree branches. To bring the vertical lines of the skyscraper into proper perspective I again used the 24mm Tilt/Shift. When first light did appear it became obvious that the front of the building, where light was needed most, would not materialize. I decided to use a ColorCombo to heighten the intensity of the greens and blues. The filter’s polarizer helped boost the contrast just a touch in the clouds; I then ‘painted’ the tree leaves with my head lamp to give them more color and detail.