

Every February 14, across the United States, candy, flowers, and gifts are exchanged in the name of St. Valentine. The Catholic Church recognizes three saints with the name Valentine, so there is a bit of confusion about which one is the actual Patron Saint of the holiday. The “holiday” as we recognize it, is centuries old and celebrated in numerous countries around the globe. The Valentine’s Day Card made its appearance in Victorian England in the mid nineteenth century. Chocolate has been associated with Valentine’s Day since Richard Cadbury perfected the chocolate making process in the 1840’s. He began selling his “eating chocolate” in decorated boxes and it quickly paired with Valentine’s Day as a gift to a loved one at about the same time.
For this food photography project, I teamed with a good friend – Chef Tony. He and I immediately began to come up with ideas for a Valentine’s Day food image. Of course, chocolate would be involved and for a bit of added dimension, it would be photographed with an espresso. Serving espresso with chocolate is very common, almost traditional in Europe. The two pair very nicely. Some people will take a small bite of the chocolate and sip the espresso across if for a hint of sweet. I personally, will drop the chocolate into the espresso and let it melt. Some eat it after and some before. It varies both by culture and by the individual.
In food photography a white background is a common request. This gives latitude to the client for placing the photograph into a larger or more detailed article. The white border disappears into a page much more easily than colored border.
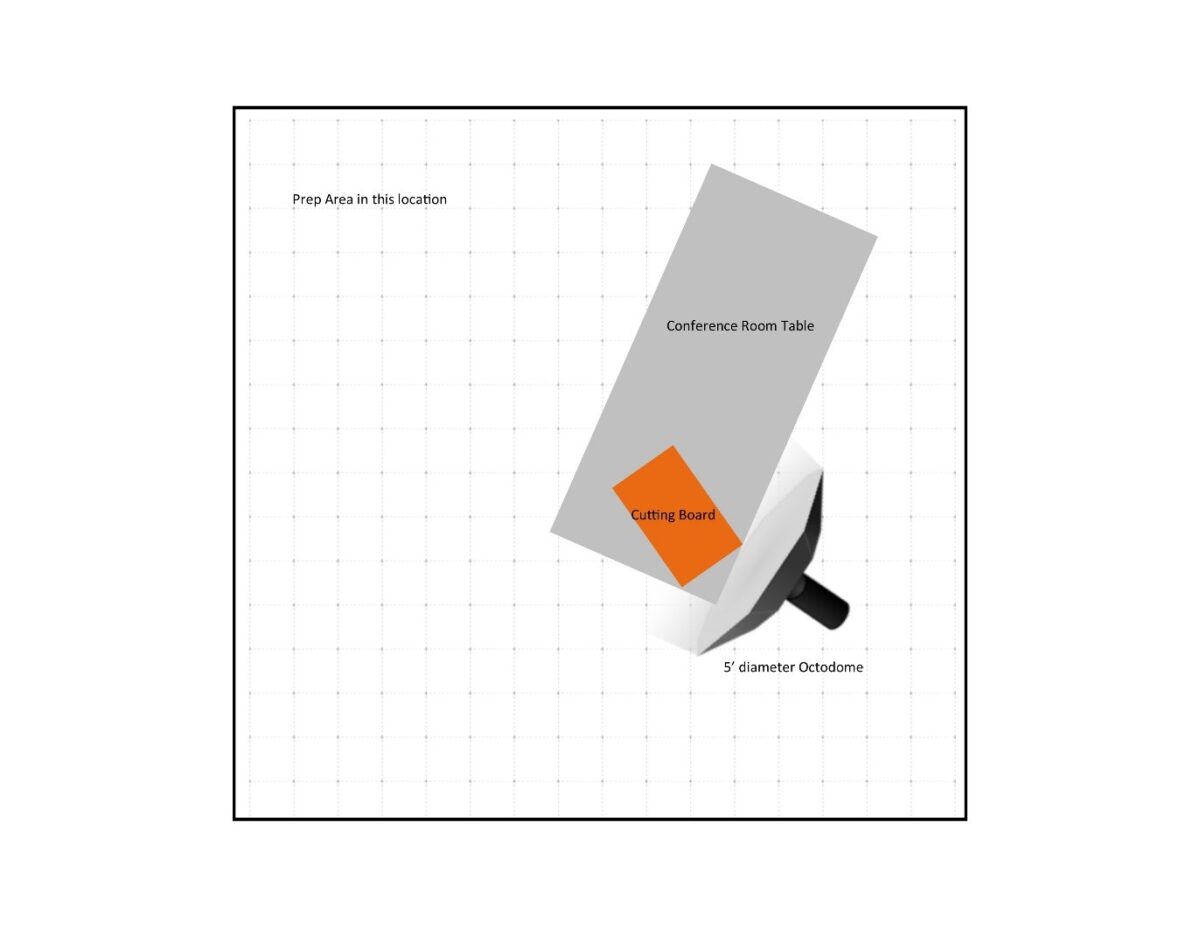
Chef Tony and I set up in a conference room with a box of foil wrapped chocolate hearts, an espresso machine, lighting and then went to work. Valentine’s Day itself has a lot of mood or ambiance naturally, which steered us away from the typical white background – we opted for black instead. We also wanted the light to be very soft. Keeping in mind that large light sources produce soft light, I chose a 5’ diameter Octodome as the light source. This was mounted to a flash head on a light stand with a sandbag counterweight.
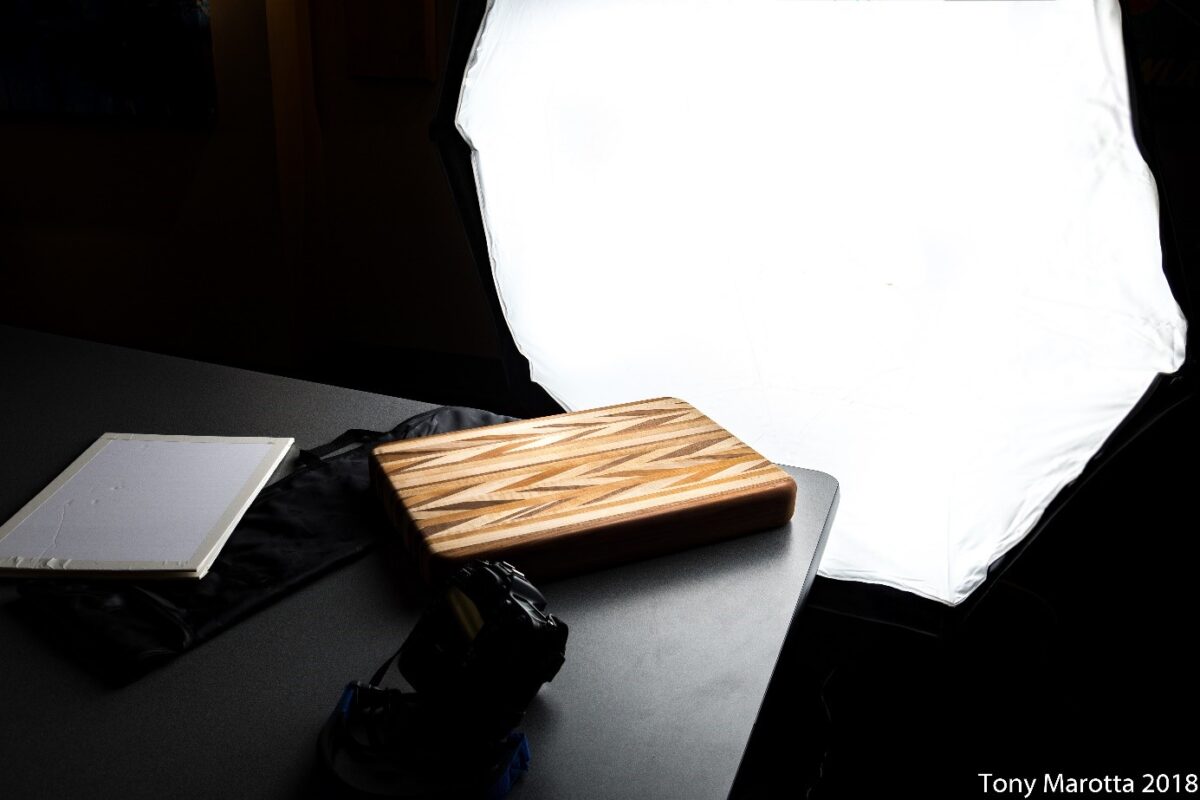
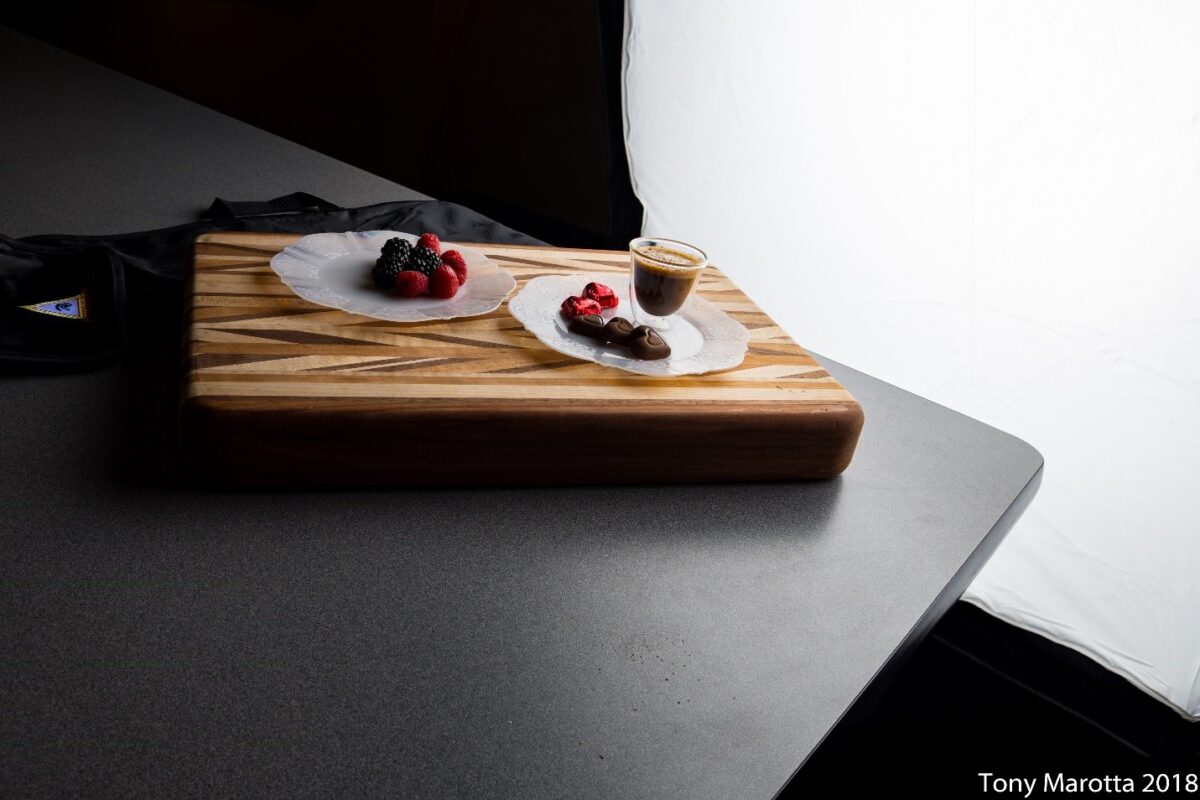
My first step was to set up the Octodome at the edge of the worktable. It was perpendicular to the surface and actually touching the table. Next, I selected one of the cutting boards Chef Tony had brought. It was a hand made one that had been given to him years ago and would serve as a simulated table top for the image. Large light sources produce soft light, but the closer you are to that source, the light gets softer yet. I pushed the cutting board against the Octodome to maximize this effect.

The initial set up revealed that I could see the grey conference room table in the image. To remedy this situation, I placed the OctoDome carrying bag under the far side of the cutting board. This provided the black color I needed on the top edge of the frame. These initial set up shots help me evaluate the edges of the photograph for unwanted elements that may appear. My mantra is to create an image that is correct in the camera first with little or no post processing, I work typically with only the tools closely aligning to the traditional wet darkroom.

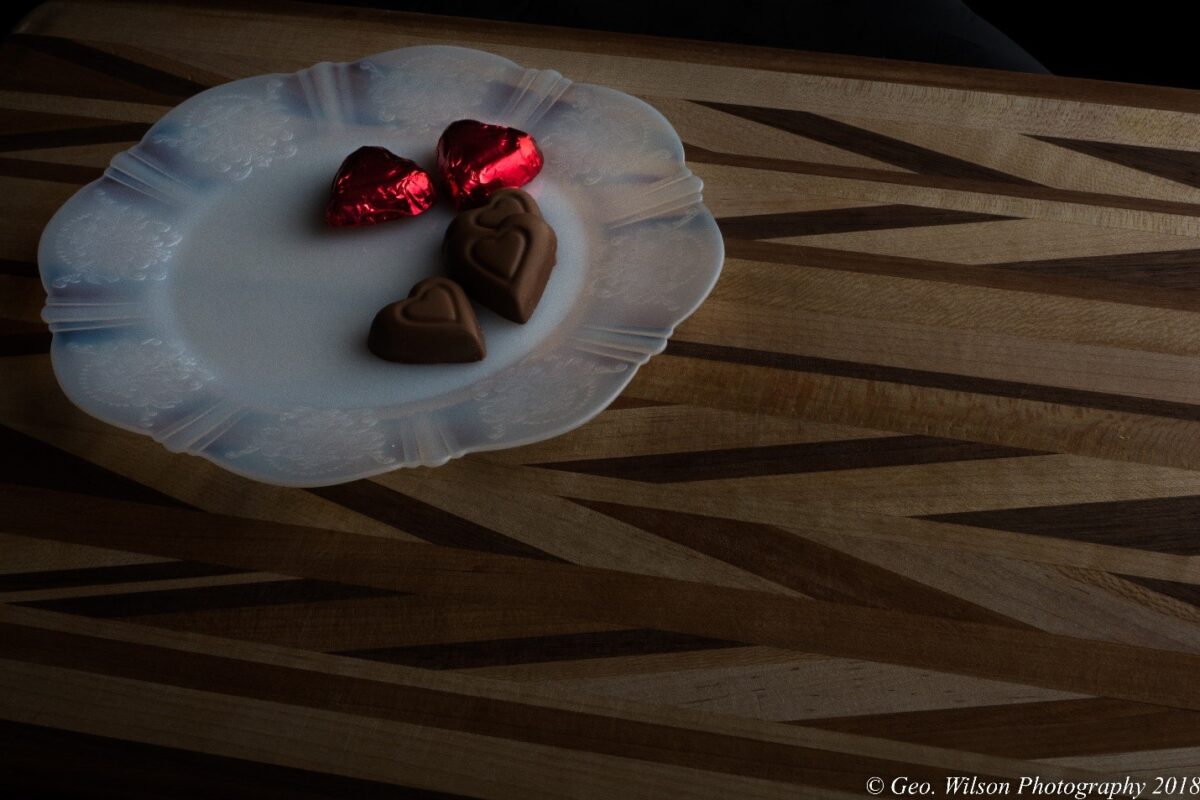
The next step is plate selection and food prep. We chose two white plates to offset the brown tones of the cutting board. The human eye also naturally gravitates toward a bright subject in an image. In this image the brown “earth” tones stabilized the image and provided contrast to the plates. This was the first step in directing the viewer where to look in this image. The plates also had a Victorian feel to them, which gave an element of design related to the Victorian era in England, when the Valentine card became popular.
In my next step I simply put one of the plates on the cutting board to check exposure and general feel. I normally start at upper left and in this case, it gave the subject too great a foreground and we also felt the subject should be closer to the light. I will generally make several positioning shots to establish the layout and the angle from which I will shoot. This a tremendous aid in determining the correct exposure. My flash meter gave me a reading of f11 with the flash head set to 1/16 power, while shooting with a 50mm f1.8 lens. I did find that this aperture put too much light on the scene, so I stopped down to f13 and then f16. This bracketed my shot one half stop of light each time and I was able to determine that f16 was the shot with the darkness I wanted.

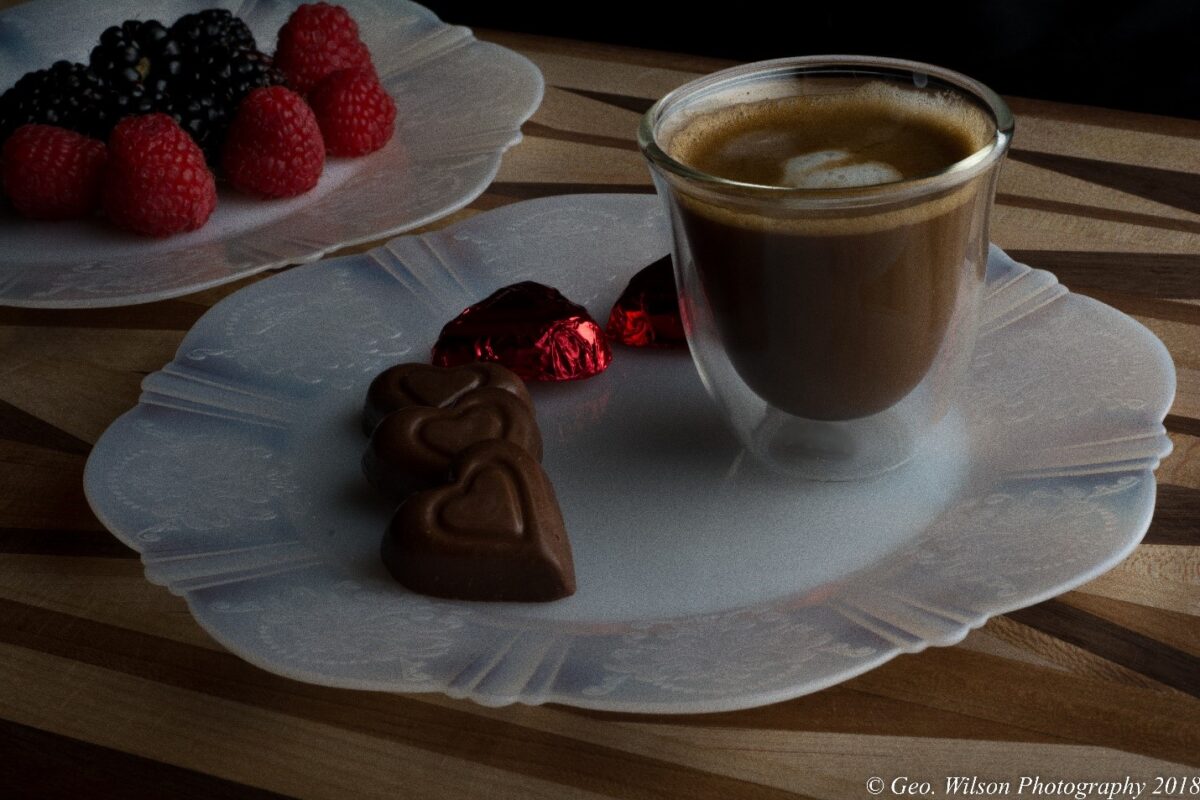
Next came the layout shot. In this image we wanted to determine the correct composition. Chef Tony brewed another espresso and arranged the chocolates, some wrapped and some unwrapped. The wrapped chocolate gave just a hint of red on the foreground plate and the heart shape definitely indicate this is a Valentine image. The unwrapped chocolates show this as ready to enjoy. He had with him a Crème brûlée torch to give them a little shine in the final image. On the rear plate, fresh blackberries and raspberries gave a bit more depth and a touch of color to the image.
I wanted to experiment with mood for just a minute, so I added a white fill card to bounce just a little bit of light back into the scene. For food photography I use what I call a corner-board, this is simply two pieces of white foam core with acid free white mounting tape edging the boards. Then the boards are hinged using the same acid free white mounting tape. This enables the light to bounce just a little bit and fill in some shadows. My boards are 10” high x 16” long. I do not need anything larger, when just working with food and small objects.
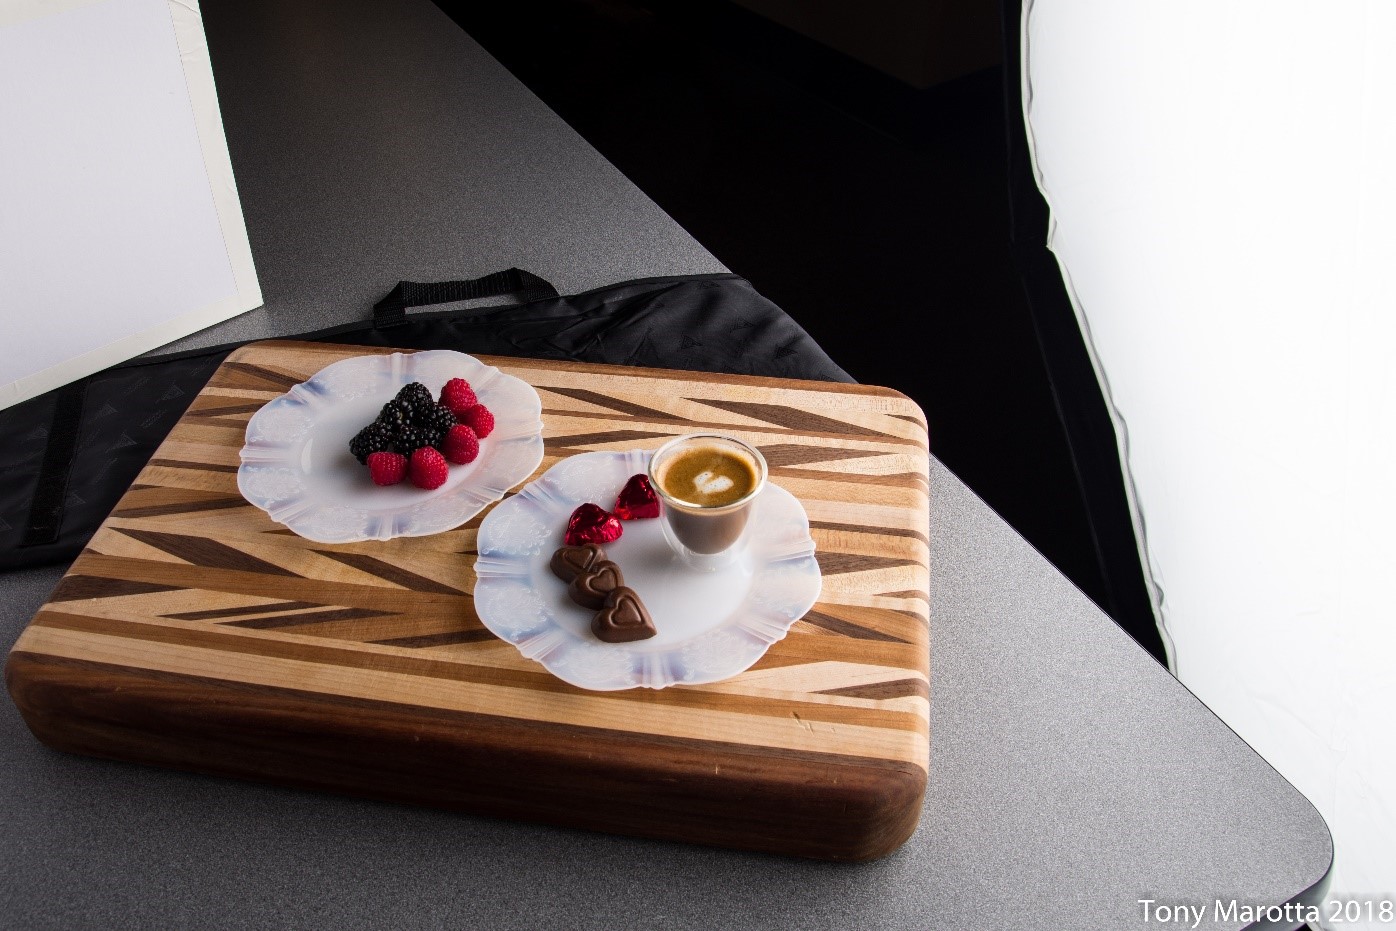
As a finishing touch Chef Tony used steamed milk to create a small heart on the top of the espresso. In our layout shot we now had the composition we liked, we had compositional elements showing a Valentine’s Day theme and the image looked like it was sitting on a table ready to be enjoyed. A couple more layout shots and we determined it looked better without the corner-board. Shooting several images helps evaluate your work and determine what works and what doesn’t.

In food photography, working times are very short. That means multiple items are used to maintain the fresh look. We had the composition, the exposure and the shooting angle. Chef Tony arranged more berries, chocolates and began making another espresso. To denote, where the final images would be, I put the lens cap back on my 50mm f1.8 and shot one “black” image. Later this image, when reviewed on the computer, tells me where the “finished” images are in the sequence. I do this in a number of situations, but primarily in product type work. I have found that days later, when assembling images for a client, this is just a very simple tool that helps me organize.
Chef Tony had everything neatly arranged, steamed milk on the espresso drawn into a heart shape. In what we thought would be the final shot, the heart on the espresso is larger and he sprinkled fresh nutmeg on it for both texture and color. Just as he finished using the Crème brûlée torch on the chocolate, I tripped the shutter.

I shot several of these varying the angle and camera position slightly each time until I had the image I wanted – or so I thought. My final exposure was ISO100, f16 at 1/160 using a 50mm lens. My camera has a sync speed of 1/250, I just prefer to be below it. Shutter speed only tells the flash when to fire. The light is controlled by the aperture.

After reviewing the image, I just felt it was too sharp for the mood I was trying to establish. A client may feel otherwise, so it is always good to present a couple of options for them based on the intended use. My aperture was f16, which provided a large amount of depth of field. To minimize this, I needed to shoot wider, which would have dictated either decreasing the flash power to 1/64. That would have given me two stops less light, so my aperture would have opened up two stops from f16 to f8. This still would have decreased the depth of field, but I felt it was not enough.
I decided to use a four-stop neutral density filter. I use Singh-Ray Filters, they are hand made here in Florida to exacting standards. Using four stops allowed me to open up the aperture without changing the flash power setting or altering my set up. A four-stop neutral density filter allowed me to open up to f4 (f16 to f11 to f8 to f5.6 and then to f4). By reducing the depth of field, I am forcing the viewer’s eye to see what I have in focus and make other elements less distracting to the viewer. They can still be seen, but being slightly out of focus they are merely secondary elements in the frame.
