Editor’s note: It’s flower time in many parts of the world now, so we thought these tips from Don Smith might be helpful – here is part one. Don’s essential tools for shooting wildflowers include his Singh-Ray warming and neutral polarizers. Many photographers also choose our ColorCombo Polarizer for flowers. One way or the other, a polarizer is a must-have creative tool for this type of photography.
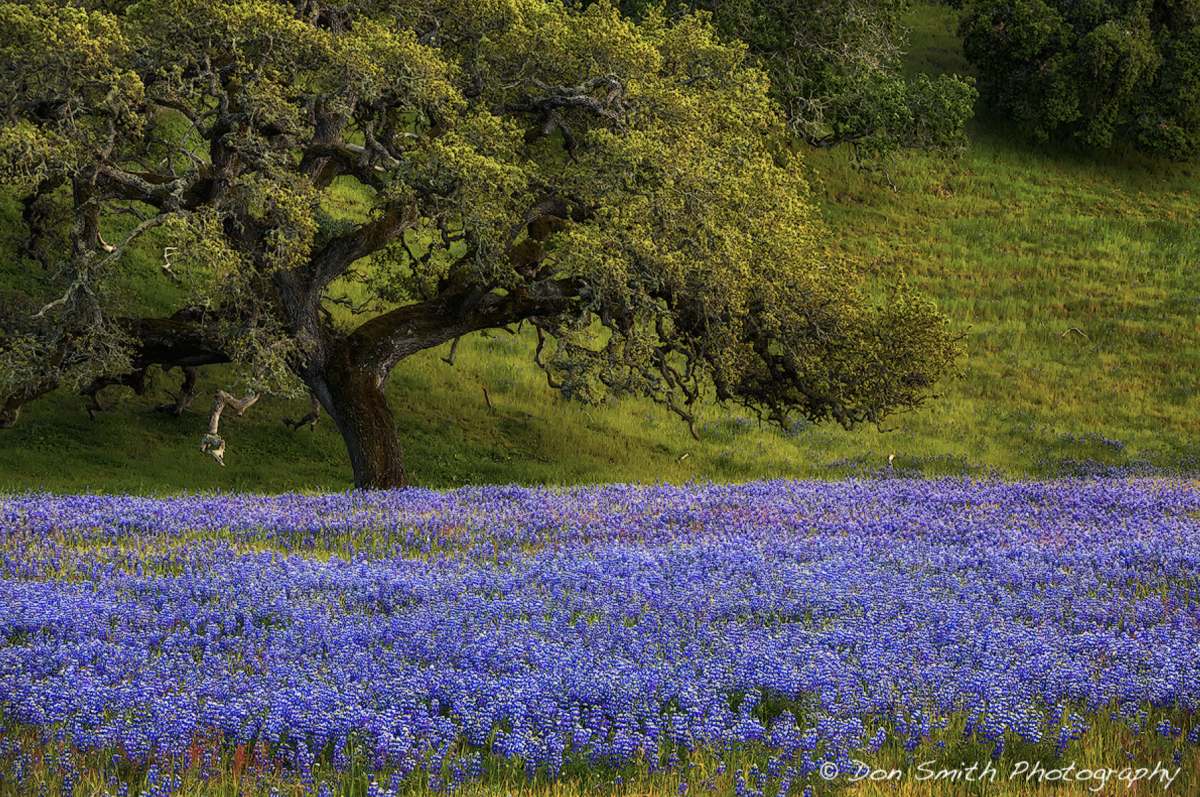
 Sony a7R II, Sony/Zeiss 24-70mm, f/22, 1/30th ISO 800.
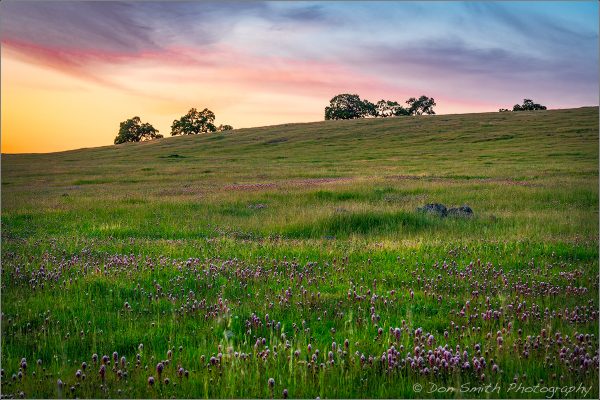
Spring is in full bloom and I know many of you are out capturing the beauty of the fleeting wildflower season.
Here in California, the coastal wildflower season begins in February and can extend into August in the Sierra high country – quite a range!
I live in a coastal valley located 18 miles inland from the Pacific Ocean. This year’s El Nino’ rains allowed for our hills to turn green in late-December. This past February the wildflowers began to emerge.
After spending a week in Northern Arizona teaching a workshop, it was nice to return and discover what has grown since I was gone. I’m finding plenty of Lupine and Owl’s Clover, but due to the lushness of the hillside grasses, many of them are not as visible as in previous years.
Regardless, much of the pleasure is in the hunt. So without further adieu, here are my 10 tips to help your wildflower photography.
Tip 1 – Shoot on the Fringes of the Day
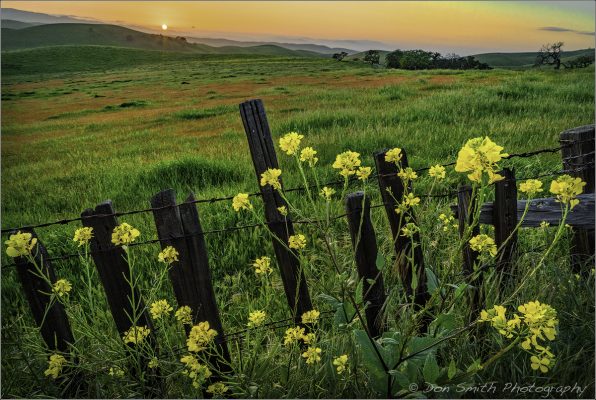
Wind is often a big concern when photographing wildflowers. I find early morning the best time of day to shoot. I’m talking really early – dawn.
Granted, many flowers’ petals are not yet open – especially poppies – but the coolness of the ground and the air allow for very slight or even no thermals.
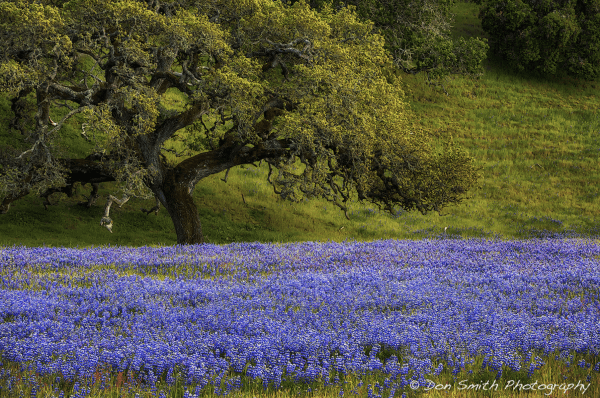
Conversely, shooting near sunset or dusk will also result in less wind – at least for most situations. I captured this image (above) just the other evening in the Diablo Hills near my home. I worked this scene for about 40 minutes and finally settled on this image when the sun slipped into a thin layer of ocean fog. Granted, those foreground flowers are really weeds – mustard weeds! It didn’t really matter to me as I photograph them all the time. One man’s weed is another man’s flower!
There was still a bit of a breeze so I raised the ISO on my Sony a7R II to 800. This allowed a 1/30th shutter speed and I just waited for the lulls. This is one frame with no grads, which demonstrates the incredible dynamic range of this camera’s sensor!
Tip 2 – Shoot Low and Lead the Eye
 Canon 5DMKIII, 24-70mm, f/8, 1/80th, ISO 200, Singh-Ray ColorCombo Polarizer
Back in 2013, the Owl’s Clover carpeted many of our local hills. It took me three consecutive evenings to get the light and composition the way I wanted for this image.
I was lying down with my camera on a tripod about a foot off the ground. My goal was to put this thick section of Clover in front of this lone Oak. There is a hill to camera-left and I waited until the sun was just skimming across the Clover. The sun’s angle to my composition was almost 90 degrees!
Luckily I spotted this small little pocket of Clover (bottom left of the frame) that I used as an anchor point before leading my viewer’s eye to the thicker patch of Clover and finally to the stately Oak.
My goal is to move my viewer’s eye through my images by creating pathways. The Oak served as a strong element that draws the eye into this beautiful color.
Tip 3 – Take an Unusual Angle
A fun option for us photographers is to show an everyday subject from an unconventional angle. I used this technique in the famed Calla Lily grove at Big Sur’s Garrapata State Beach last month during my annual Spring Big Sur Workshop.
My group was working the grove after a sunrise shoot with indirect light. As I often do, I wandered around between participants asking if anyone needed assistance. Satisfied that everyone was into their photographic zone, I took my Sony RX100 IV out and tried to explore these sensual Lily’s from different angles. I am usually without a tripod when working with this camera and this frees me up to really move around.
I ended up really liking this top – down angle, which allowed the sensuality of this lone Lily to take center stage. I burned-down the foliage around the Lily in post allowing the eye to go right to the flower. I simply moved the camera up and down with a rather shallow aperture until I found the focus point – CLICK!
Tip 4 – Focus-Bracket for Extreme Depth-of-Field
 Canon 5DMKIII, 70-200mm, f/11, 1/8th, ISO 640, Singh-Ray LB Warming Polarizer, (3) frames with focus placed on foreground, mid-ground, and background and blended in Photoshop using Image Stack.
Oftentimes when working with telephoto lenses, near-to-far focus is all but impossible, even at f/22. A Hyperfocal App can give you precise range of focus for any given focal length/sensor combination.
When I am outside the range and I want more depth-of-field, a good technique to use is what’s known as focus stacking. For this image, I simply bracketed three frames with my focus on the foreground, mid-ground and background.
Back in Photoshop, I used the Files > Scripts > Load Images Into Stacks and allowed the software to figure out the blend. Once the images were combined, I went back to Lightroom and processed the blended image as a single shot.
Tip 5 – Use Promote Control or Other Focus-Stacking Tool for More Complicated Focus Blends
 Canon 5DMKIII, 70-200mm, f/8, 1/50th, ISO 400, 17 frames shot at 110mm with Promote Control.
The more telephoto you get with your compositions, the more difficult it becomes to zone focus properly. For this image, I tried focusing myself but found I was not precise enough.
I returned the next evening with my Promote Control. This is a device that hooks into your hot shoe and essentially calculates your focusing zones automatically. All I had to do was to set my camera/lens on my tripod, compose, then enter the nearest point I wanted to have in sharp focus and the furthest point. I then let the unit take over. It calculates how many frames of bracketed focus and does it automatically – it focuses and trips the shutter on its own.
For this scene, I needed 17 frames! I then processed the images in Helicon Software. My tests reveal a better algorithm for tough blends such as this. Photoshop is good but Helicon is better IMO.