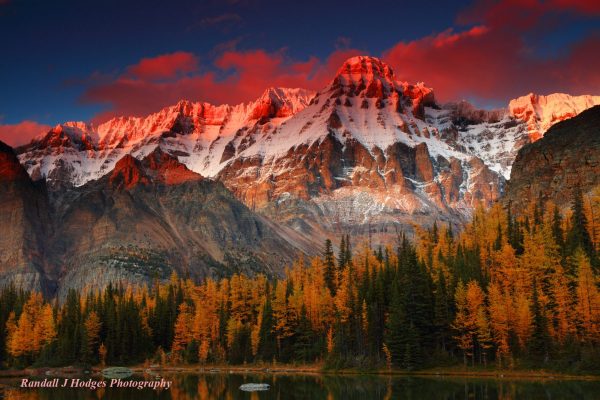
This is the second article in my “All in Camera” series for the Singh-Ray blog. Today, I’d like to highlight the need to control white balance during image capture and discuss a valuable in-camera tool you might not currently be using that can help you with this – what I call the “Digital Rolls of Film” settings available in most DSLR cameras (“Picture Control” in the menu of Nikon DSLRs and “Picture Style” in Canon DSLRs). Let’s start with this image.

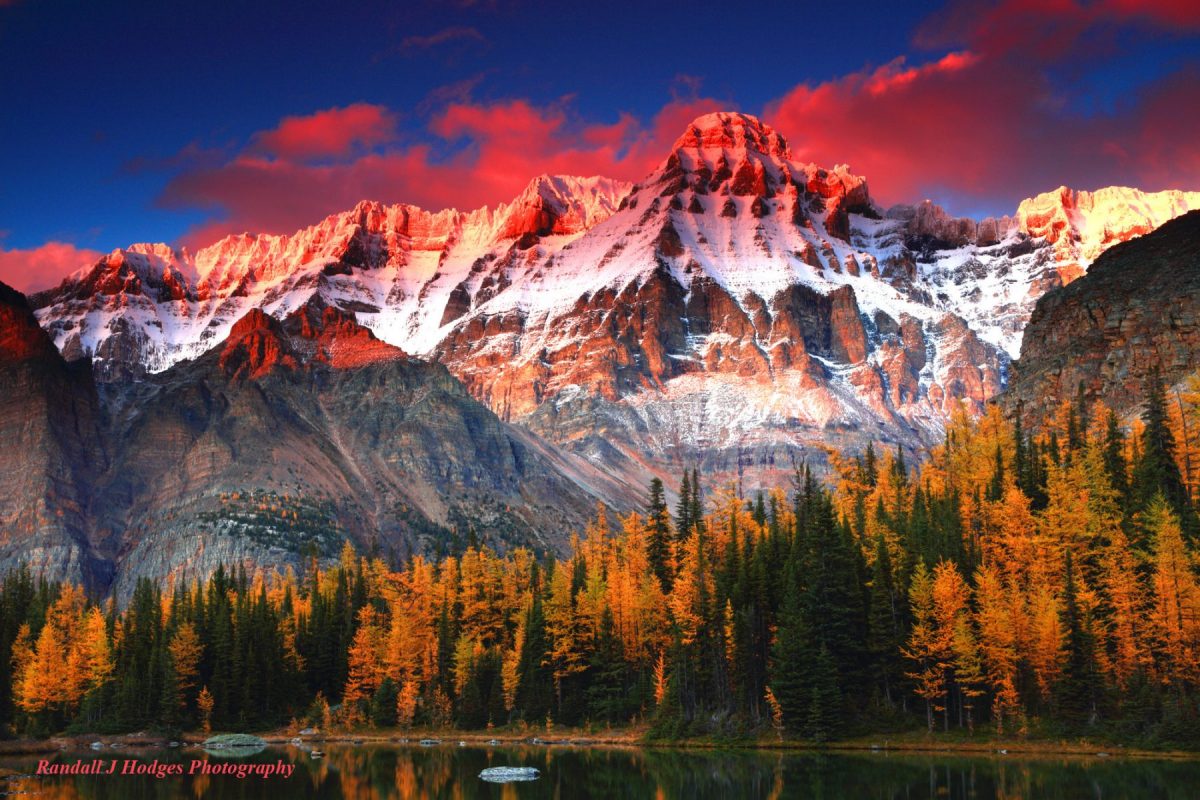
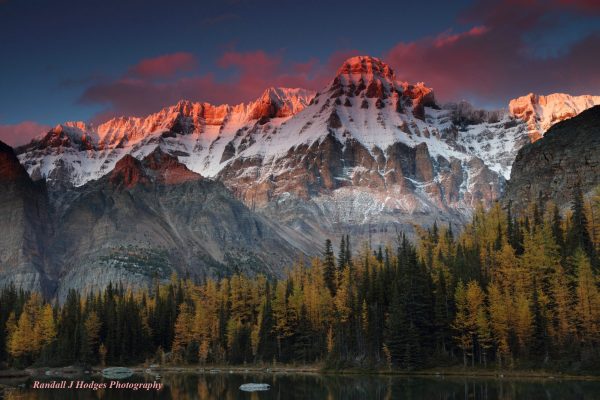
Sunset on Mt Huber As it Towers Over Golden Larch On Shaffer Lake in the Lake Ohara Region of Yoho National Park in Brittish Columbia Canada
This sunset image was shot in Aperture Priority at f/20 with a 1-second exposure, -1 full stop dark, at ISO 100, with White Balance set at 6100K using my ‘Landscape” adjustment in the Picture Style menu of my Canon. I also used both the 1- and 3-stop Singh-Ray Galen Rowell graduated neutral density filters to balance the light from sky to ground. The 3-stop grad is pushed down to the pink light line in the image, while the 1-stop grad is pushed all the way down to the tree line. This image was shot on the new Canon 5DS-R on a Gitzo tripod, with a Gitzo ballhead.
I’ll get into more detail on how to set up your camera’s “Digital Rolls of Film” settings in the next entry to this blog, but I want to mention how your camera sees color, right out of the box with its factory settings – and the options available to you. All digital SLR and mirrorless cameras have “Digital Rolls of Film” picture setting menus in them. Most people just don’t know about them or how to set them up. If you’re a Canon shooter, your Picture Style menu includes Auto, Landscape, Standard, Monochrome, Portrait, Faithful and Neutral settings. If you’re a Nikon shooter, your Picture Control menu includes Standard, Landscape, Vivid, More Vivid, Monochrome and Portrait, depending on the camera model. Other brands, such as Sony, Fuji and Panasonic, also have these color controls or “Digital Rolls of Film,” just under different names.
Unfortunately, your camera comes out of the box using only 20-30% of its possible color output potential. These color controls are set to flat and often, depending on model, the camera is also set by default to “Auto Color,” putting the camera in charge, rather than you. Here’s what the image above would have looked like if I’d left my camera in default Auto Color mode, as it came out of the box.
Now that’s one terrible-looking image, in my opinion! I should also mention this was also shot on default Auto White Balance. Once you set up your “Digital Rolls of Film” preferences, it’s critical to control the color temperature with your White Balance. Most post-processing photographers leave White Balance on Auto, and adjust it later. For us “All in Camera” shooters, white balance is our very, very important tool for controlling the color temperature of our image. Too low on the Kelvin or “K” scale and our colors are bluish and weak. Too high and our color can turn “hot” or brownish in tint. The key with in-camera shooting is to nail the white balance setting in the correct “Digital Roll of Film.” Here are two different white balance setting for the image above, both shot in the “Landscape” Picture Style setting on my Canon.

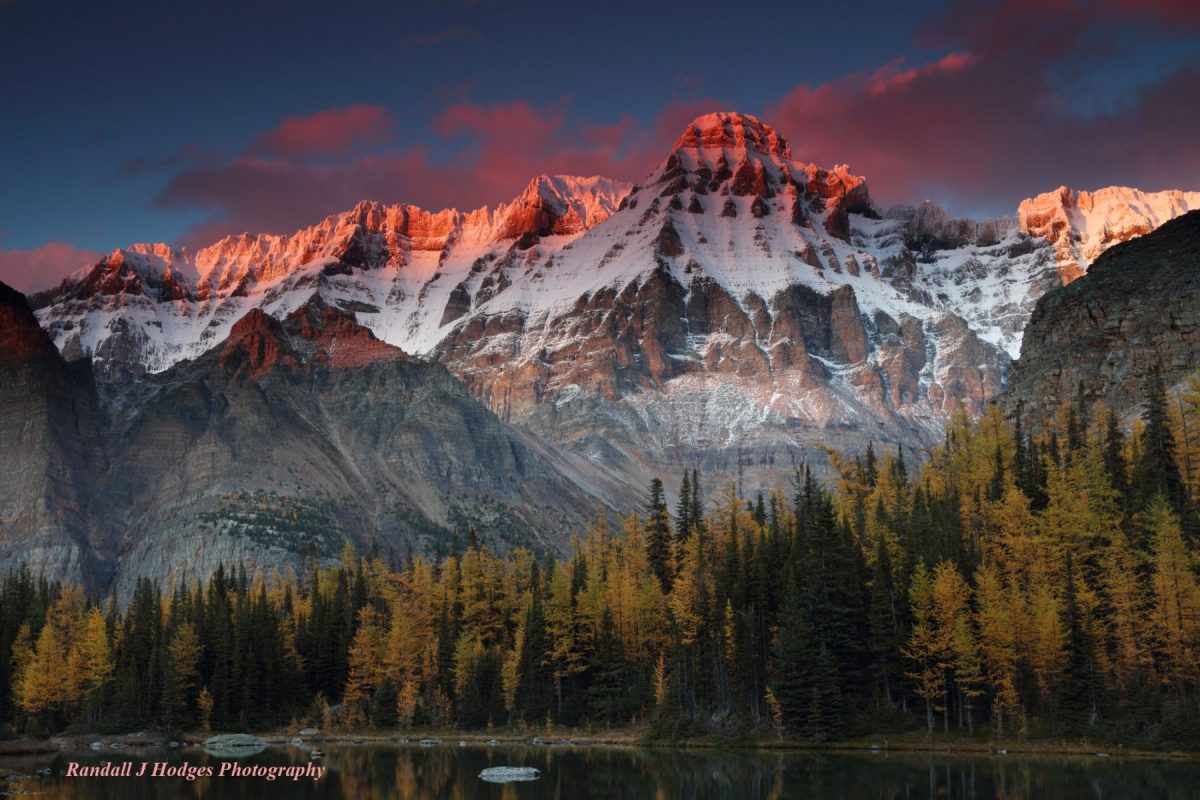
The White Balance on this one is set to 4500K. You can clearly see it is too blue or “cold.”
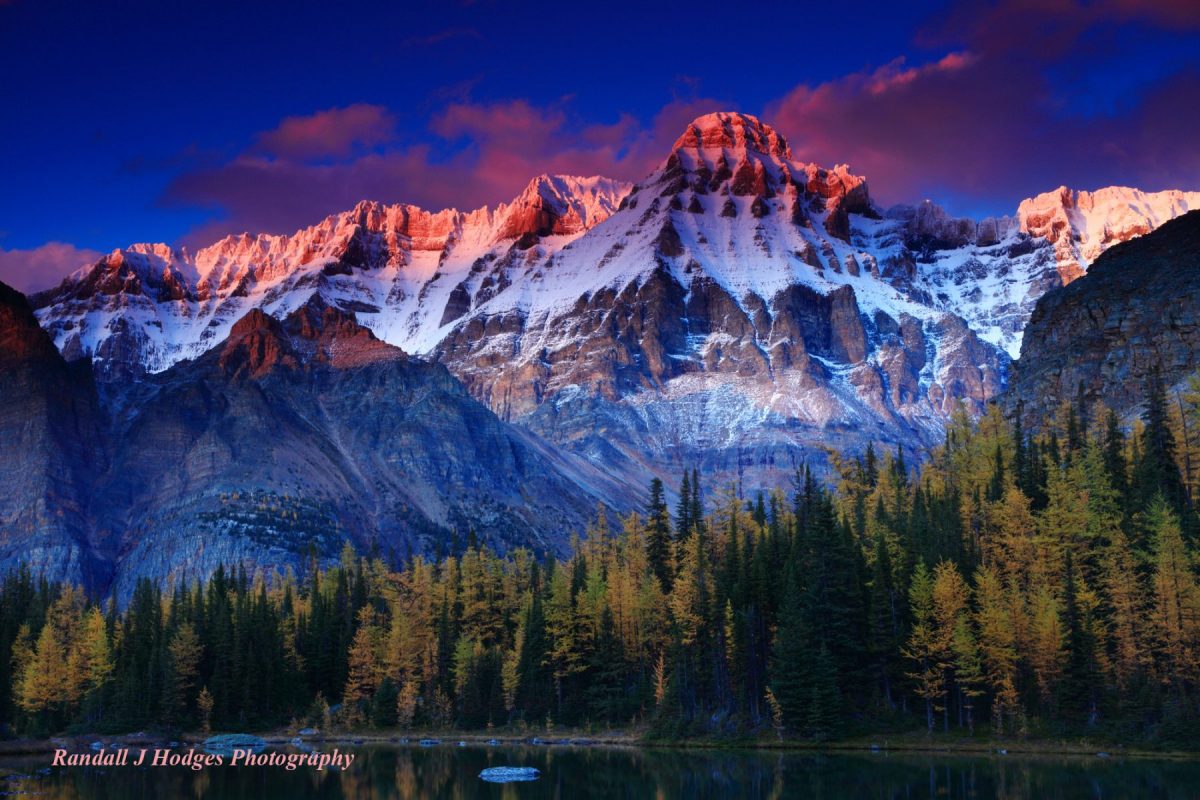
This one is shot at 7500K White Balance and is way too hot!
Take another look at the image at the start of this post. that was shot at White Balance 6100K – and looks just right (at least in my humble opinion). Hopefully, this little demonstration shows “All in Camera” or “old school” shooters the importance of carefully controlling and adjusting camera White Balance while out in the field. The image above shot at 4500K and and the one shot at 7500K do not represent what I was seeing at all (I over-adjusted White Balance in these two to quickly illustrate the differences). If you aspire to become an “all in camera” shooter, I would strongly suggest practicing this technique ahead of time on a stable subject in stable light, so that you are confident about controlling your camera’s White Balance in the field.
I want to make a special note, which I’ll touch on more in a future post. Many photographers believe you cannot adjust your RAW files in camera, which simply isn’t true. I did all the processing work I need to do on these images in camera, in the field. Consequently, my total “post-processing” work when I get home averages less than 30 seconds per image. Essentially, I don’t need to do anything!
Lightroom and Photoshop cannot “see” the in-camera changes you made to your RAW file. An example of this would be if you shot an image in camera in the “Black and White” setting and then opened it in Lightroom or Photoshop. The image you see will be in color, as this is the RAW version they see. However, if you open the same RAW file with the software that came with your camera (like Canon Digital Photo Professional) you will see the RAW file in Black and White, as you shot it in camera. You can then convert and save it – and then open it in Lightroom or Photoshop, if you like. That’s the one extra step all in-camera shooters must do if shooting in RAW. So always initially convert and save the file with the software that came with your camera.
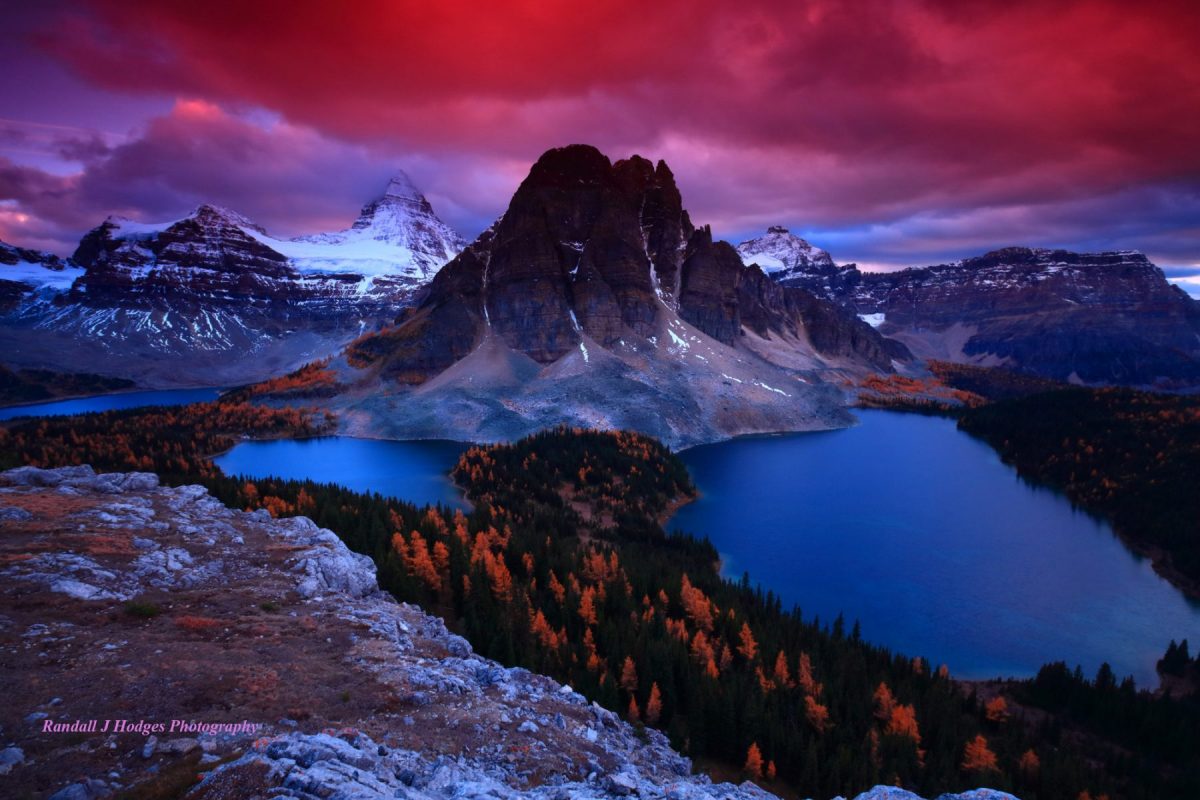
I hope you have found this second “All in Camera” article to be both helpful and enjoyable. Next, I will go into more on your camera’s “Digital Rolls of Film” and get you started with some basic shooting recipes. Of course, if you want to learn these techniques firsthand, join me in the field or at a seminar. You can check out my website at www.randalljhodges.com and click the lessons tab. I will leave you with one more image from my recent 20 days spent shooting the amazing Canadian Rockies:

Sunset, Mt. Assiniboine over Cerluean Lake, Sunburst Lake and Lake Magog from the Niblet in Mt Assiniboine Provincial Park in British Columbia, Canada
Happy shooting!